

How to Check TPM and Fix “This PC Can’t Run Windows 11”
Agar Windows 11 install karte waqt error aata hai:
“This PC can’t run Windows 11”
to aksar reason hota hai:
TPM disabled
ya TPM missing
Is guide me aap screenshots ke saath TPM check aur enable karna seekhoge.
Step 1: Open TPM Management Tool
Steps:
Windows + R press karein
Type karein:
tpm.msc
Enter press karein
Aapke system me TPM console open ho jayega jahan status dikhega.
Step 2: Check TPM Status
Agar TPM available hai to:
“TPM is ready for use” show hoga.
Agar message aaye:
“Compatible TPM cannot be found”
to TPM disabled ya missing hai.
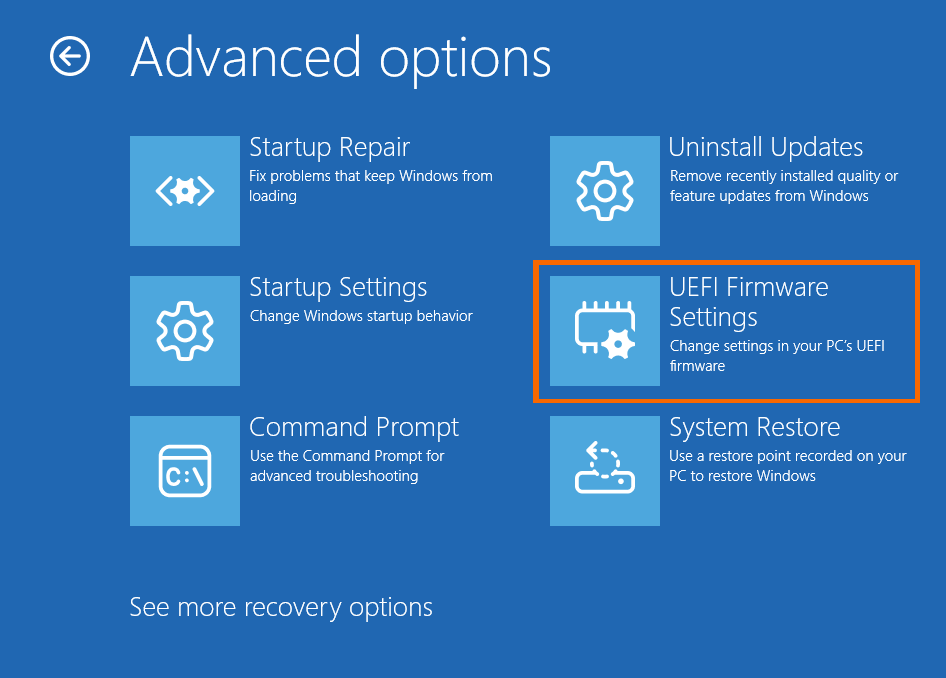
Step 3: Open BIOS / UEFI Settings
Steps:
PC restart karein
Boot ke waqt repeatedly press karein:
Delete
F2
ya F10
Isse BIOS settings open ho jayengi.
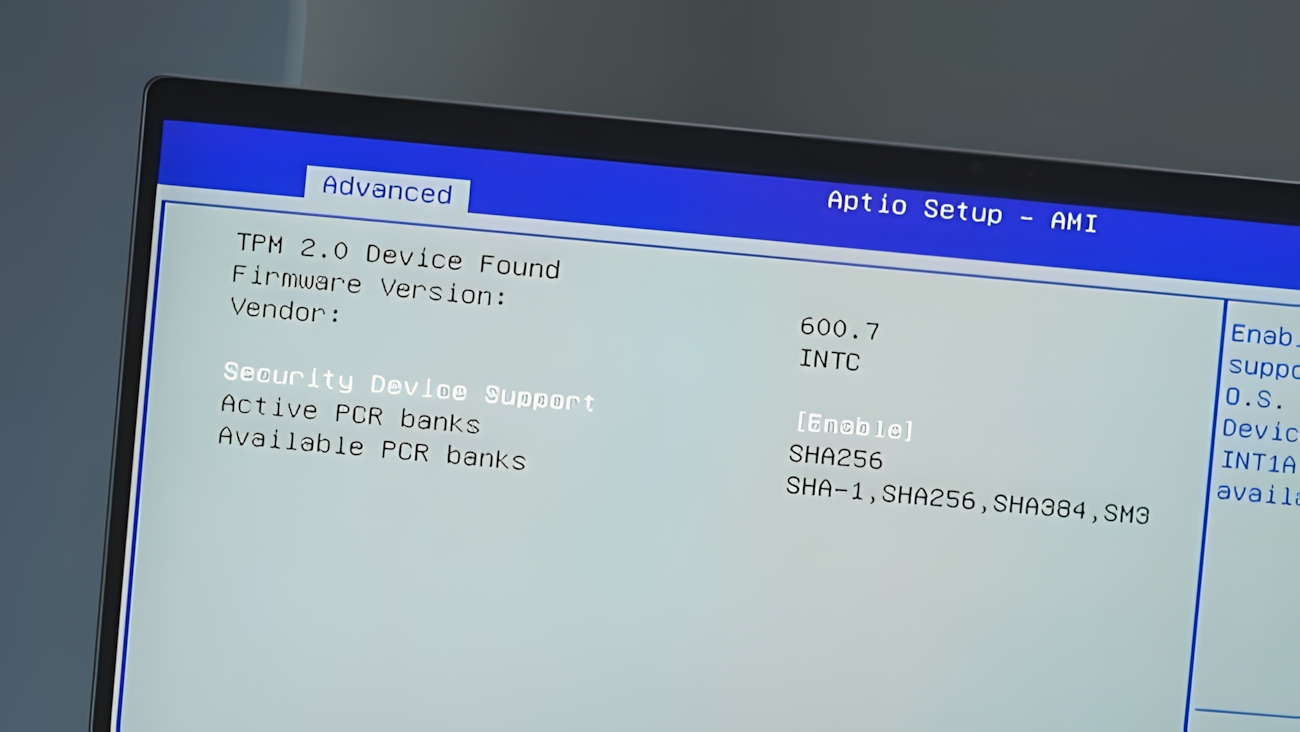
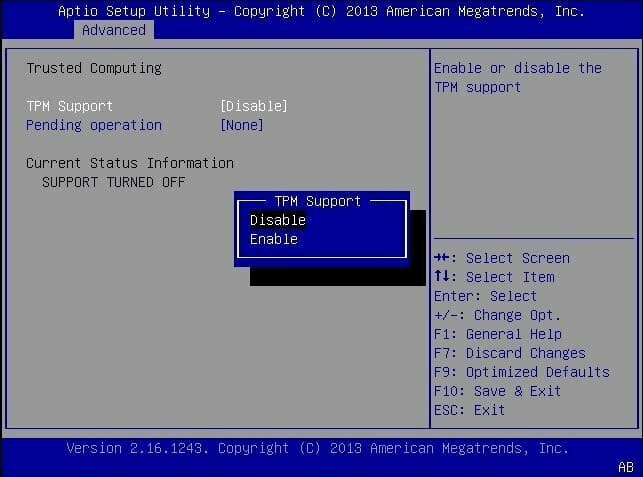
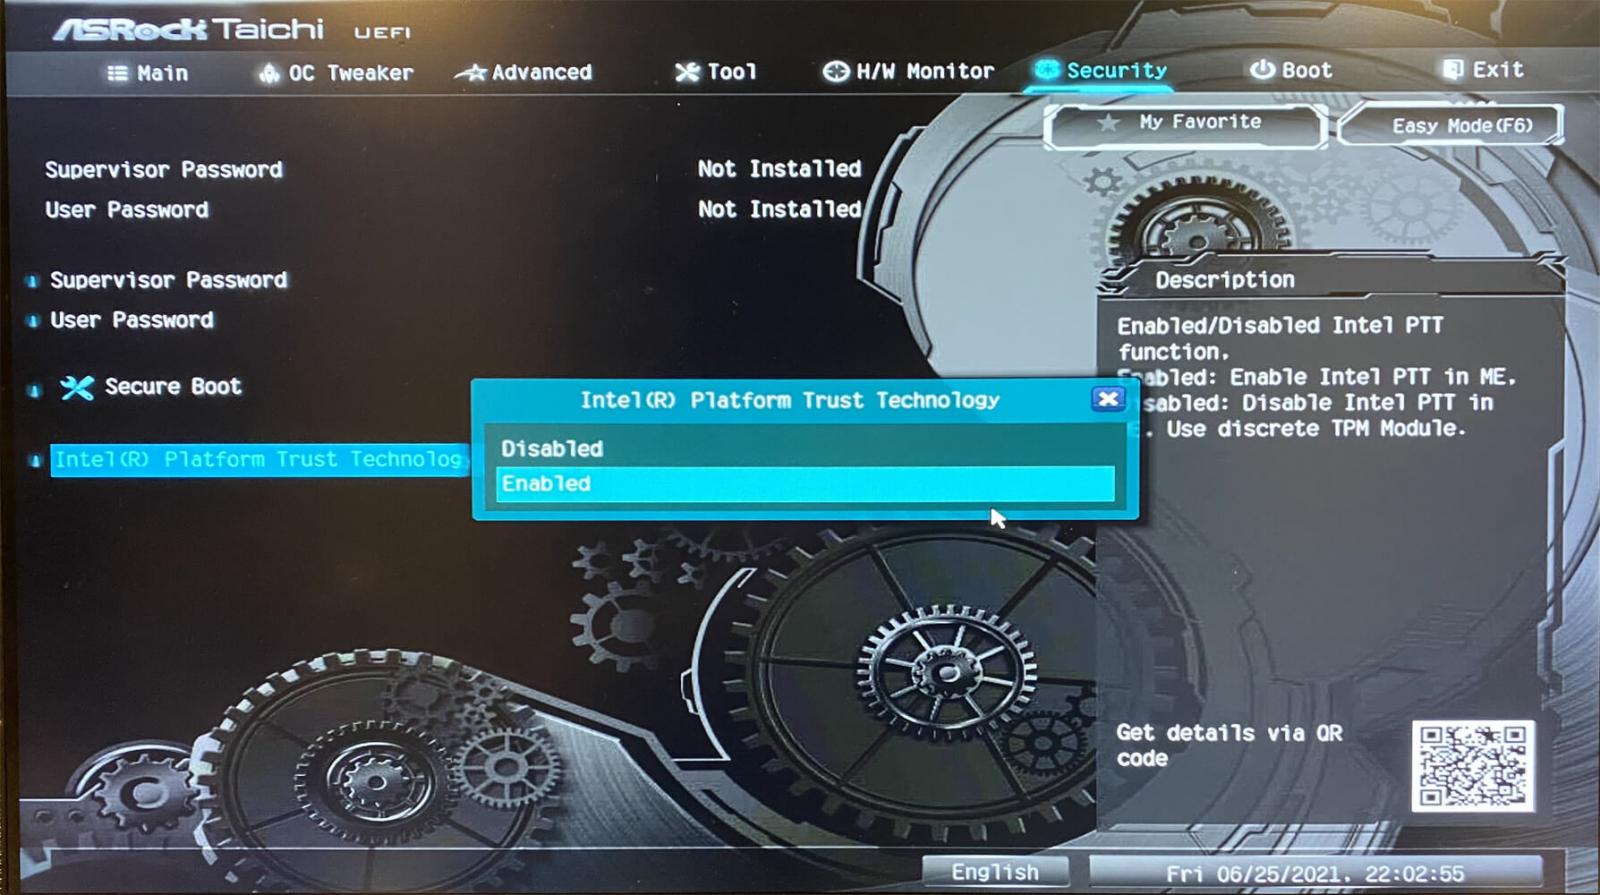
Step 4: Enable TPM in BIOS Security Settings
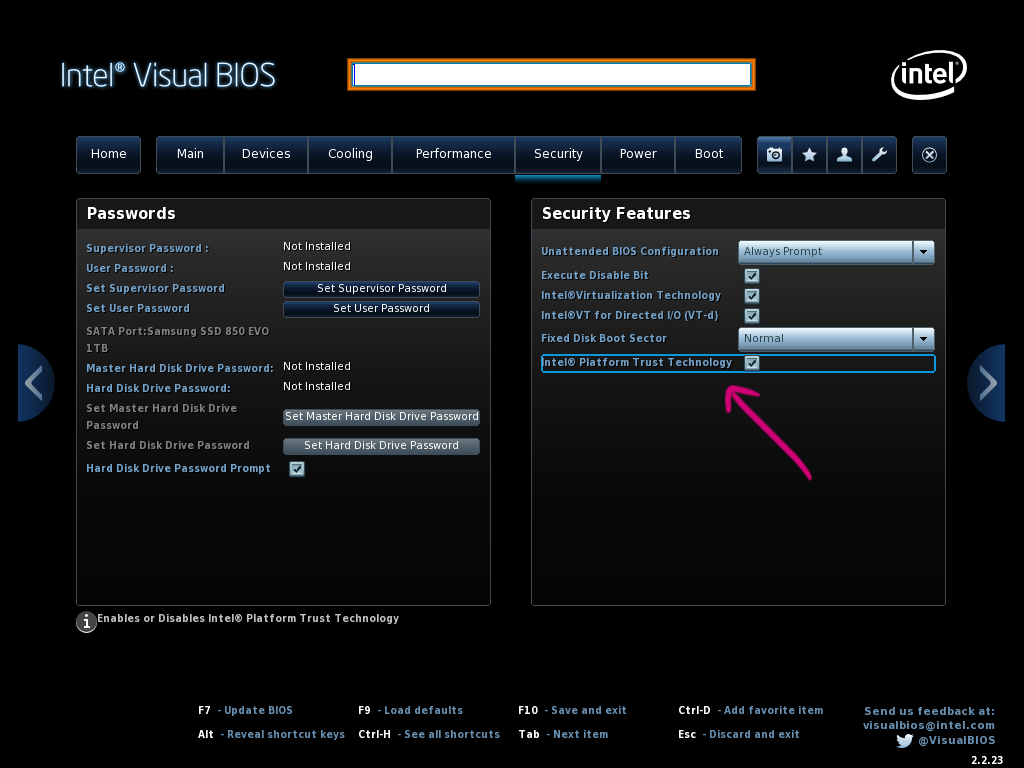
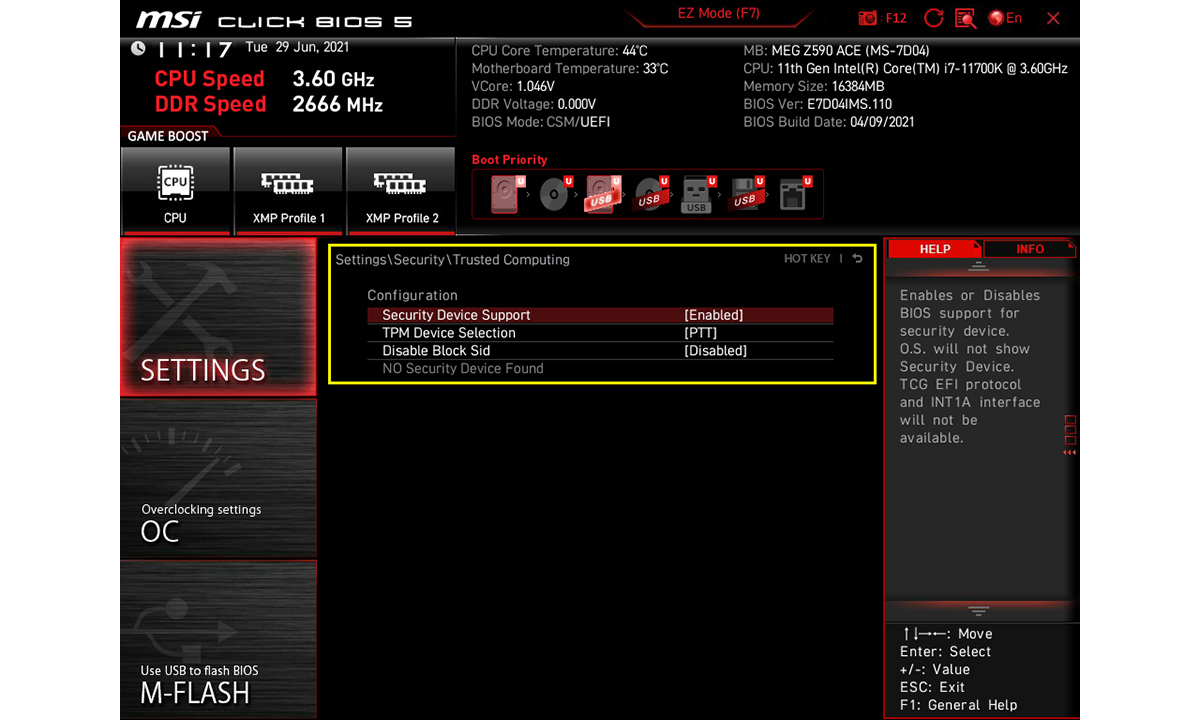
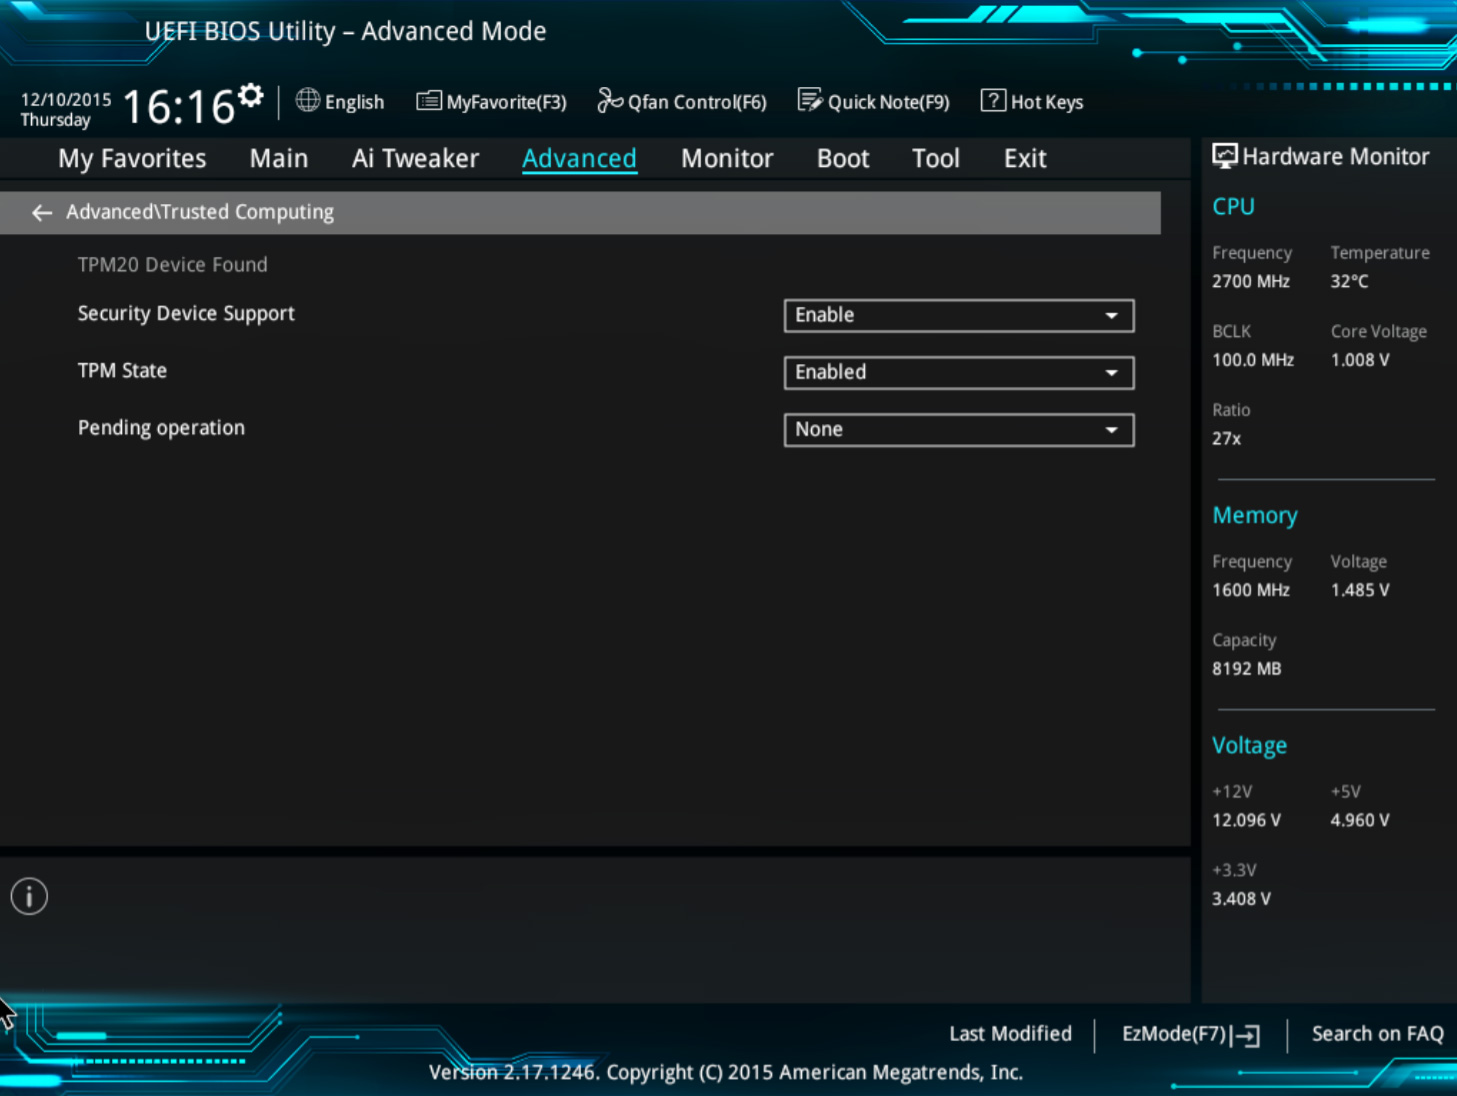
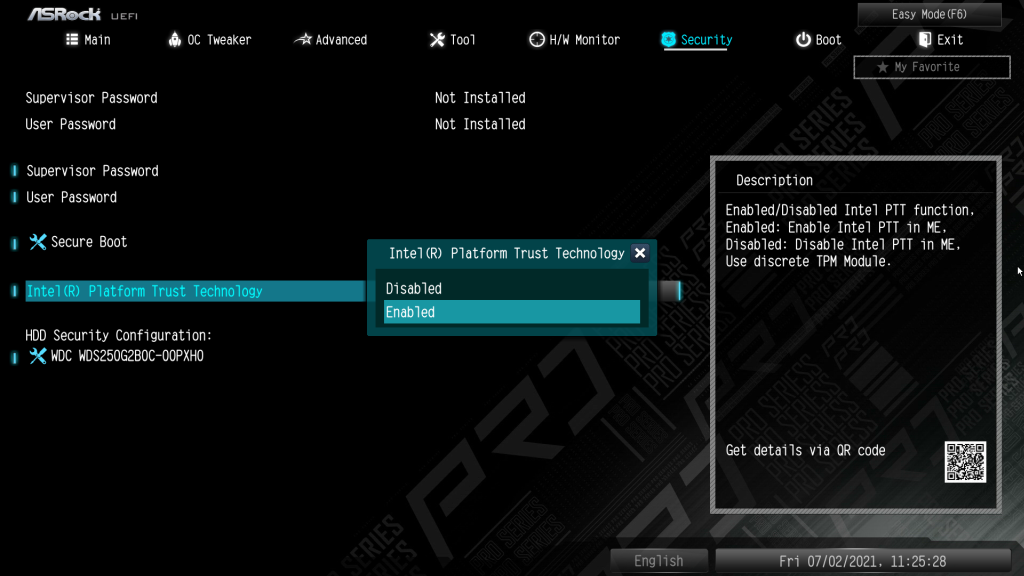
BIOS me TPM different naam se hota hai:
Intel systems → PTT
AMD systems → fTPM
Aapko yeh setting usually milti hai:
Security → Trusted Computing → TPM → Enable
Step 5: Save BIOS Settings
Steps:
F10 press karein
Save and Exit select karein
PC restart ho jayega aur TPM enable ho jayega.
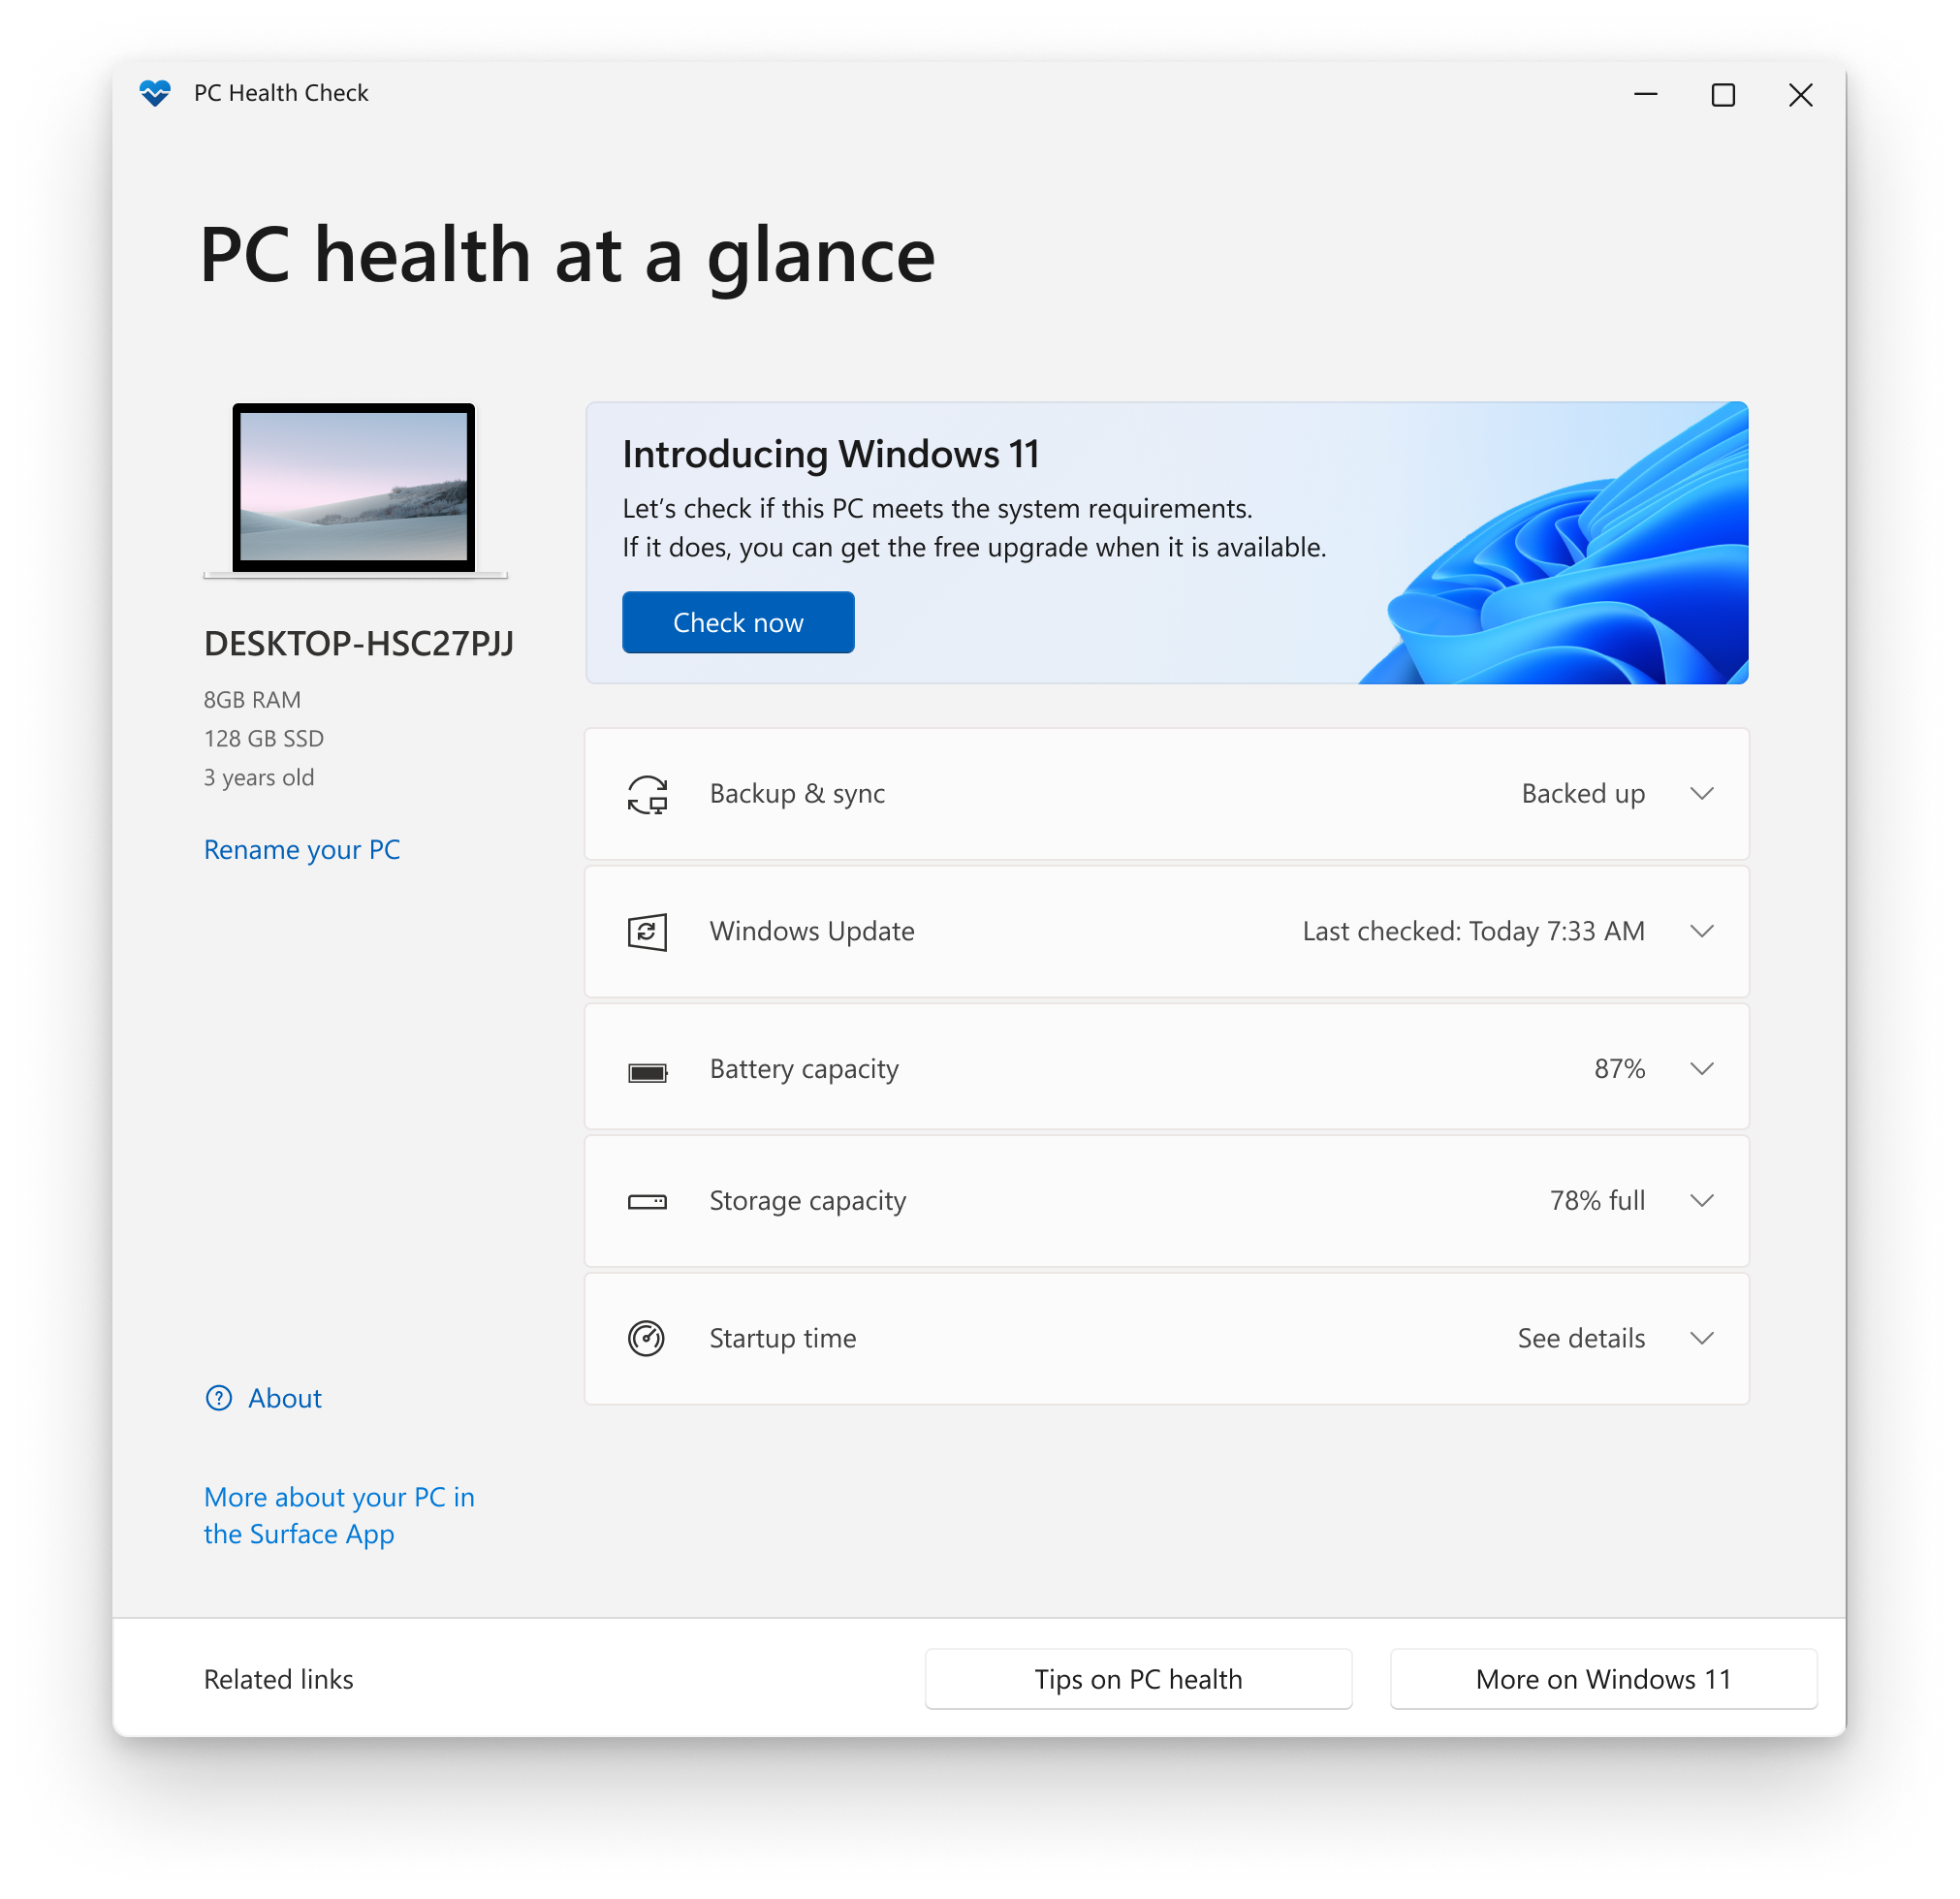
Step 6: Check Windows 11 Compatibility Using Official Tool
Microsoft ka official tool:
PC Health Check
Steps:
PC Health Check install karein
Open karein
Check now par click karein
Yeh tool batata hai ki:
TPM detect ho raha hai ya nahi
Windows 11 install ho sakta hai ya nahi
Why TPM is Required in Windows 11
Microsoft ne TPM ko mandatory kiya hai taaki:
BitLocker encryption secure ho
malware attacks se protection mile
secure boot properly kaam kare
Agar Windows 11 install nahi ho raha:
TPM check karein (
tpm.msc)BIOS me TPM enable karein
PC Health Check se compatibility verify karein
Is tarah aap bina risky methods ke officially supported tarike se Windows 11 ke liye system ready kar sakte ho. ✅


0 Comments